
How to Tackle Barbed Wire Fence Removal Safely

That old, sagging barbed wire fence is more than just an eyesore. It’s a hazard for your livestock, a trap for your equipment, and a project that’s been on your to-do list for far too long. Taking it down often seems straightforward, but anyone who has tried knows it’s a tough, physical job that can quickly become overwhelming. The wire tangles, the posts fight back, and the risk of a nasty cut is always present. This guide is here to change that. We’ll break down the entire process into clear, manageable steps, helping you decide if this is a project you can tackle yourself. Proper barbed wire fence removal is all about having a solid plan, the right tools, and a focus on safety from start to finish.
Key Takeaways
- Gear Up and Release Tension First
: Your most important steps are protecting yourself with proper gear, like leather gloves and eye protection, and releasing the wire's tension before cutting to prevent dangerous snap-back.
- Work Methodically in Small Sections
: Avoid creating a hazardous mess by using the right tools, such as post pullers and bolt cutters, and clearing one small section at a time. Cut wire into short lengths and roll it securely as you go.
- Realistically Assess the Scope of Your Project
: A short fence line can be a manageable DIY task, but don't hesitate to call a professional for large, overgrown, or complicated removals. It saves time and prevents potential injury.
Removing a Barbed Wire Fence: DIY or Call a Pro?
Taking down an old barbed wire fence is a tough job, and deciding whether to do it yourself or hire it out is a big question. For many Nebraska farmers and ranchers, it comes down to the size of the project, the condition of the fence, and how much time you can spare. A short, simple fence line might be a manageable weekend task, but a long, overgrown one can quickly turn into a major headache. Thinking through the scope of your project will help you decide the best way to get that old wire cleared out for good.
When to Tackle It Yourself
If you're looking at a relatively short and simple stretch of fence, a DIY approach can work well. The key is putting safety first. Before you even start, make sure you have the right gear. You’ll absolutely need heavy gloves, thick pants, and a sturdy jacket to protect yourself from cuts. When you begin, use strong wire cutters and cut the wire into short, easy-to-handle pieces rather than trying to wrestle with long, tangled strands. It’s also helpful to work in sections, focusing on a manageable length between a few posts at a time. This keeps the job from feeling overwhelming and helps you stay organized and safe.
When to Call for a Professional Fence Tear-Out
Sometimes, a fence removal job is just too big or complicated to handle on your own. If your fence line is heavily overgrown with trees and brush, or if the posts are deeply embedded and rotted, it’s time to call in the pros. These situations often require heavy equipment to clear the area efficiently and safely. A professional fence tear-out service has the right machinery and experience to handle large-scale projects, saving you time and preventing potential injuries. For extensive or difficult areas, letting a team with the proper tools manage the removal ensures the job is done quickly and your land is ready for what’s next.
Gather Your Safety Gear
Before you even think about pulling the first post, taking a moment to gear up properly is the most important step. Working with old barbed wire is unpredictable, and the right personal protective equipment (PPE) is your first line of defense against nasty cuts, eye injuries, and other common hazards. It might seem like a hassle, but spending a few minutes getting dressed for the job can save you from a trip to the doctor and weeks of painful recovery. Think of it as your uniform for a tough but rewarding job. When you’re ready to clear that old fence line, we can help with the fence line cleaning to prepare for what's next.
Essential Gloves and Eye Protection
This is non-negotiable. You need heavy-duty leather work gloves, not cloth or garden gloves, to protect your hands from deep punctures from sharp barbs. A tetanus shot is not a fun way to spend an afternoon. Equally important are safety glasses or goggles. Old wire can be brittle and under tension, and it can snap unexpectedly, sending pieces flying toward your face. Your eyesight is too valuable to risk, so make sure you have proper eye and face protection before you start.
The Right Clothing and Footwear
Cover your arms and legs with durable, thick clothing. Heavy denim jeans and a long-sleeved canvas or work shirt will help shield your skin from scratches and scrapes. Tucking your shirt in can also prevent it from snagging on the wire as you work. On your feet, wear sturdy, over-the-ankle work boots, preferably with a thick sole. You’ll be walking on uneven ground and potentially stepping on stray pieces of wire, so good footwear protects you from both twisted ankles and puncture wounds.
Face Protection for Dust and Rust
An old fence has been exposed to the Nebraska elements for years, accumulating rust, dust, and dirt. When you start pulling and cutting wire, all those particles become airborne. Wearing a simple dust mask or a more robust respirator prevents you from inhaling rust and other debris, which can irritate your lungs. It’s a small step that makes the work much more comfortable and protects your respiratory health over the long term.
How to Prevent Common Injuries
Beyond what you wear, how you work is critical for safety. Always be aware of wire tension. A taut wire can whip back with incredible force when cut. To avoid this, always stand to the side of the wire and never cut it directly in front of your body. When handling coiled wire, be mindful that it can spring open unexpectedly. Taking a deliberate, cautious approach to handling barbed wire will help you avoid the most common and painful injuries associated with fence removal.
The Right Tools for Fence Removal
Tearing down an old barbed wire fence is a tough job, but having the right equipment makes all the difference. It’s not just about working faster; it’s about working smarter and, most importantly, safer. Using tools designed for the task reduces the risk of injury and prevents damage to your equipment and land. Before you head out to the fence line, taking a few minutes to gather the essentials will save you a lot of frustration and trips back to the workshop. If you get started and realize the job is bigger than you thought, remember that a professional fence tear-out is always an option to get it done quickly and correctly.
Wire Cutters and Bolt Cutters
A quality pair of wire cutters is non-negotiable for this job. You’ll be snipping the barbed wire into smaller, safer sections, which is much easier than wrestling with a full-length roll. Look for cutters made from hardened steel that can stand up to old, rusty wire. For the thicker gauge tension wires or the stubborn metal clips on T-posts, a set of bolt cutters is your best friend. They provide the extra leverage needed to make a clean cut without straining your hands or damaging your primary cutters. Using the right tool for the right wire thickness prevents tool breakage and makes the entire process go more smoothly.
Post Pullers and Farm Jacks
Getting old posts out of the ground is often the most physically demanding part of fence removal. While it’s tempting to wrap a chain around a post and pull it with a tractor, this often bends metal T-posts or snaps wooden ones at the ground line. A dedicated T-post puller is a much better solution. It uses simple leverage to pull the post straight up, preserving the post for reuse and leaving a clean hole. For larger, stubborn wooden posts, especially corner posts, a farm jack provides the vertical lifting power to pop them out of the ground without the struggle.
Fencing Pliers, Hammers, and Screwdrivers
Fencing pliers are the multi-tool of fence work, and you’ll be glad to have them. They are specifically designed with a hooked end for prying out staples from wood posts, a flat head for hammering, and built-in cutters for quick snips. You’ll rely on these to efficiently detach the wire from your posts. A standard claw hammer is also useful for pulling stubborn staples and knocking clips loose. It’s also a good idea to have a heavy-duty flathead screwdriver on hand. Sometimes the metal clips on T-posts are bent too tightly for pliers to grab, and a screwdriver provides the perfect tool to pry them open.
Buckets and Other Helpful Items
This might be the simplest tip, but it’s one of the most important for safety and cleanup. Bring a few 5-gallon buckets or a large tub with you along the fence line. As you pull staples, unwrap clips, and find small pieces of broken wire, toss them directly into the bucket. Nothing ruins a day faster than a flat tire on your ATV or tractor from a forgotten staple. This practice keeps your pasture safe for livestock and prevents sharp metal from getting tangled in future farm equipment. A clean work area is a safe work area, and this simple habit makes final disposal much easier.
Prepare Your Work Area
Before you even think about snipping the first wire, taking time to prepare your work area is the most important step for both safety and efficiency. An old fence line that’s been standing for years can hide plenty of surprises, from wire buried in the dirt to sections still holding a surprising amount of tension. A thorough walkthrough and a bit of cleanup can make the entire removal process go smoother and, more importantly, help you avoid a nasty injury. Think of it as setting the stage for a successful project. This is the same professional approach our team takes with every job, ensuring a clean and safe site from start to finish. Of course, if the job looks too big or you'd simply rather have an expert handle it, our professional fence tear-outs are always an option for landowners in Central Nebraska.
Inspect the Fence Line for Hazards
Old barbed wire isn't something to take lightly. Start by walking the entire fence line, keeping your eyes peeled for hazards. The wire itself is the biggest risk; it can be brittle, hidden in the grass, or still under tension in some spots. Loose ends can snap back unexpectedly, so always be aware of where you're stepping and cutting. Because you'll be dealing with old, rusty metal, it's a good idea to make sure your tetanus shot is up to date. A small cut from rusty wire can lead to a serious infection, and it’s a simple precaution that provides peace of mind.
Clear Away Vegetation and Obstacles
Fences that have been up for a while tend to become one with the landscape. You’ll likely find tall grass, thick brush, and even small trees that have grown through or around the wire. Clearing this vegetation away is a crucial step. It gives you a clear line of sight, helps you see where the wire falls when you cut it, and prevents you from tripping over hidden roots or debris. You don't need to clear a massive path, just enough to give yourself a safe and stable area to work in. This simple cleanup makes the actual removal process much less frustrating and a whole lot safer.
Organize Your Tools and Grab a Partner
Having your tools laid out and a plan in place will save you a lot of headaches. Make sure your wire cutters are sharp and your post puller is in good working order. More importantly, this is not a job to tackle alone. Grab a partner to help you; it makes the process much safer and more efficient. One person can hold the wire steady on both sides of the cut while the other person snips it. This prevents the wire from whipping back. A partner can also help you roll up the cut sections, making the cleanup go twice as fast. Working together turns a daunting task into a manageable project.
How to Remove a Barbed Wire Fence, Step by Step
Step 1: Release the Wire Tension
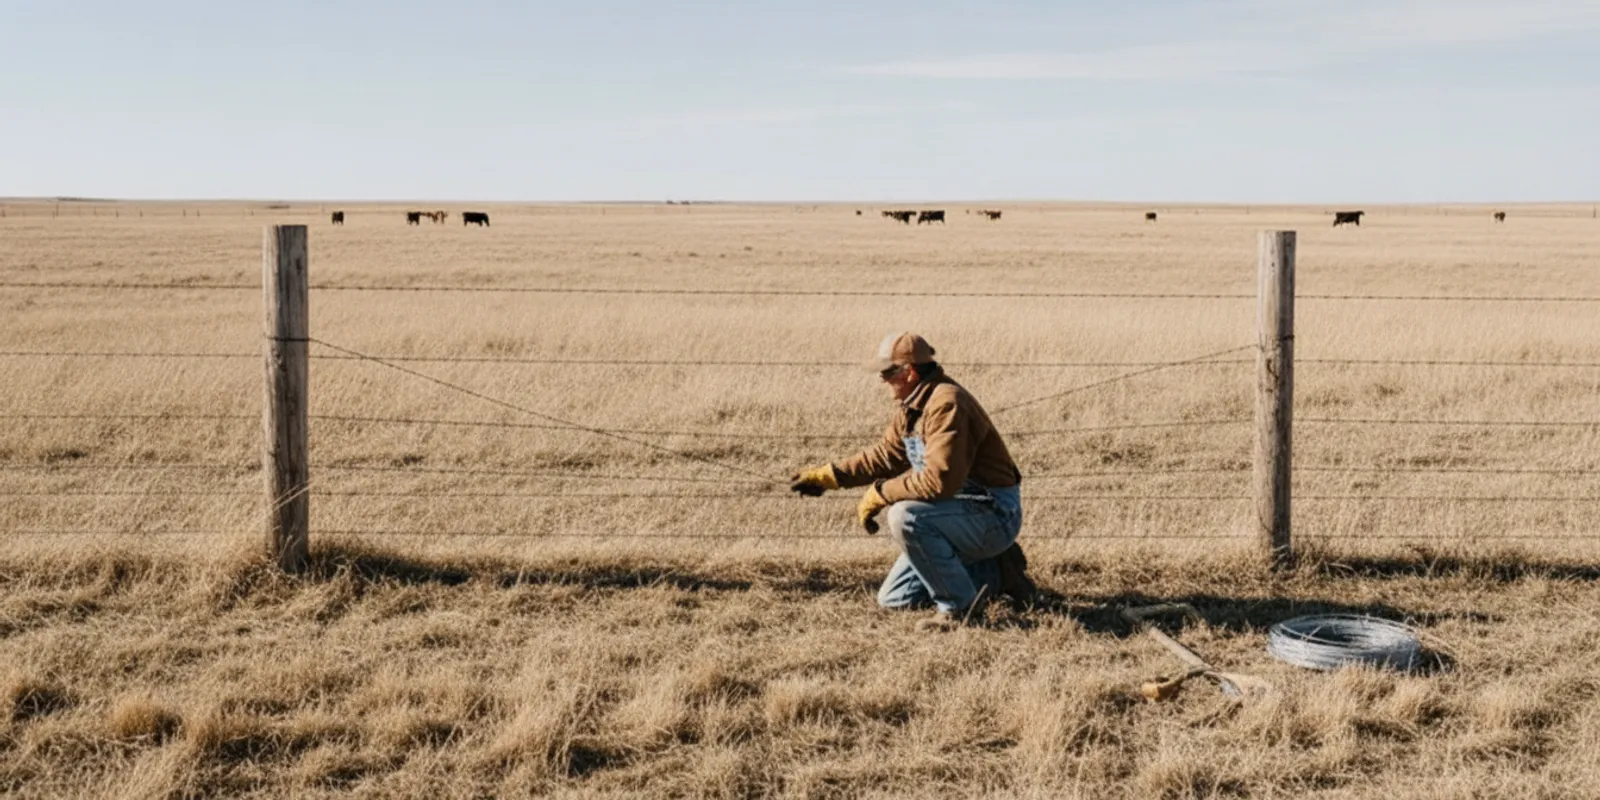
Before you make a single cut, you need to release the tension from the wire. A taut barbed wire can snap back with incredible force when cut, posing a serious risk of injury. Start at one end of the fence line. For wooden posts, use a hammer and a punch to carefully knock the staples out just enough to loosen the wire; don’t pull them all the way out yet. For metal T-posts, use your pliers to untwist the wire ties or clips holding the wire. Your goal is to create slack along the entire line, making the wire loose and safe to handle for the next steps. This is the most important safety measure, so take your time.
Step 2: Remove Staples and Clips from Posts
With the tension gone, you can now work on completely freeing the wire from the posts. Go back down the line and pull out all the staples from your wooden posts using the claw end of your fencing pliers. For metal T-posts, finish removing the clips you loosened earlier. A flathead screwdriver can be helpful for prying open stubborn clips. It’s a good idea to carry a magnetic dish or a sturdy bucket with you to collect all these small metal pieces. Leaving staples and clips on the ground can lead to flat tires on your equipment later or create a hazard for livestock.
Step 3: Cut Wire into Manageable Sections
Once the wire is completely free from the posts, it’s time to cut it. Never try to roll up a full-length strand of barbed wire; it’s unwieldy and dangerous. Using a pair of heavy-duty bolt cutters or linesman's pliers, cut the wire into shorter, more manageable lengths. A good rule of thumb is to cut sections no longer than five or six feet. Shorter pieces are much less likely to tangle or spring back unexpectedly. This makes the wire easier to handle, roll, and transport for disposal. Always wear your thickest gloves during this step, as the barbs can easily catch on clothing and skin.
Step 4: Roll and Secure Wire as You Go
As you cut the wire into sections, you need to handle it properly to keep your work area safe and organized. Carefully roll each section of wire into a tight coil. Be mindful of the barbs and keep your hands and body clear as you roll. Once a coil is formed, secure it tightly in at least two places to prevent it from springing open. You can use pieces of softer 14-gauge wire or heavy-duty zip ties for this. A well-secured coil is safe to handle and stack, making the final cleanup and disposal process much smoother. Don’t just pile the loose wire; that’s asking for trouble.
Step 5: Work Your Way Down the Line
Removing a long fence is a marathon, not a sprint. The best approach is to work methodically down the fence line, completing one section at a time. Focus on fully clearing a 20- to 30-foot section: release tension, remove clips, cut the wire, and roll it up before moving to the next. This keeps your workspace from becoming a chaotic and dangerous mess of loose wire. If the job feels too big or you run into unexpected problems, remember that professional help is available. Our team is experienced in handling even the most challenging fence tear-outs and can clear your land quickly and safely.
How to Remove Fence Posts
Once the barbed wire is safely rolled up and set aside, your next task is to deal with the fence posts. This part of the job can be just as physically demanding as handling the wire, especially if you're dealing with old wooden posts set deep in the Nebraska soil. The method you use will depend on whether you’re removing metal T-posts or traditional wood posts. Metal posts are usually more straightforward, while wood posts, particularly those set in concrete or stubborn clay, can put up a real fight.
Having the right equipment is key to making this process go smoothly and safely. For metal posts, a specialized puller is your best friend. For stubborn wooden ones, you might need to bring in some heavier machinery like a farm jack. No matter the type, the goal is to get them out of the ground cleanly without leaving behind hazards. If you're looking at a long line of deeply set posts and feeling overwhelmed, remember that a professional fence tear-out is always an option. A pro team can make quick work of post removal, saving you time and a lot of back-breaking effort. After the posts are out, the final step is to fill the holes to make the land safe for livestock and equipment.
Use a T-Post Puller for Metal Posts
When it comes to pulling metal T-posts, a T-post puller is a game-changer. This simple lever-action tool is designed specifically for this task. It grips the post securely and uses leverage to pull it straight out of the ground. Using a puller is the best way to remove T-posts because it minimizes the chance of bending or damaging them, which is great if you plan on reusing them for another project. Just position the puller at the base of the post, secure the grip, and push down on the handle. The post should pop right out of the ground with much less effort than trying to wiggle it out by hand.
Tackle Stubborn Wooden Posts
Wooden posts can be a real workout to remove, especially if they’ve been in the ground for years. Start by trying to loosen the post by hand. Rock it back and forth and side to side to break up the soil around its base. If it’s still not budging, it’s time to bring in some extra muscle. A high-lift jack, often called a farm jack, is an excellent tool for this. Wrap a heavy-duty chain securely around the base of the post, hook it to the jack, and carefully begin to lift. The steady, powerful upward force from the jack can pop even the most stubborn posts out of the ground.
Fill and Level the Post Holes
After all your hard work pulling the posts, don't forget the final, crucial step: filling in the holes. An open post hole is a serious hazard on any property. It’s a broken leg waiting to happen for livestock and a dangerous trip hazard for people and equipment. Take the time to go back down the fence line and fill each hole with soil or gravel. Tamp the material down firmly to make sure it’s compact and level with the surrounding ground. This simple action restores the safety of your pasture and leaves your land ready for whatever comes next, whether it's new grazing ground or preparation for a brand new fence.
How to Dispose of Old Fencing Materials
Once the last post is pulled, it might feel like the job is done, but you're not quite there yet. You're now left with piles of rusty wire and old posts, and what you do with them matters. Proper disposal isn't just about tidying up your property; it's a crucial safety step for your family, your livestock, and any equipment that crosses your land. A single forgotten strand of barbed wire can cause a serious injury to an animal or get tangled in a tractor tire for years to come. It's a hazard that's just not worth leaving behind.
This final cleanup phase can be surprisingly time-consuming and physically demanding. You have to sort all the materials, carefully bundle sharp wire, and then figure out how to haul everything away. It’s a heavy lift, both literally and figuratively, and it often requires another full day of work after the fence is already down. This is one of the main reasons many landowners in Central Nebraska choose to have professionals handle their fence tear-outs. But if you're committed to seeing the project through yourself, we've got you covered. Here’s how to manage the cleanup safely and effectively.
Roll and Secure Wire for Safe Transport
Dealing with loose barbed wire is a recipe for disaster. The best way to handle it is to roll it into tight, manageable coils as you work. Start a roll and continue adding wire until it’s about as large as you can comfortably handle. As the coil gets bigger, use 14-gauge soft steel tie wire or heavy-duty zip ties to secure it in at least three or four places. This keeps the coil from springing apart unexpectedly during handling and transport. A tightly secured roll is much safer to move and won't become a tangled, hazardous mess in the back of your truck.
Separate and Recycle Scrap Metal
Your old barbed wire and metal T-posts don't have to end up in a landfill. Most scrap metal yards will happily accept them for recycling, which is a great way to dispose of them responsibly. Before you head to the yard, make sure your wire coils are tightly bound, as we just discussed. It’s also a good idea to call your local scrap yard ahead of time to confirm they accept barbed wire and ask about any specific preparation they require. Separating your metal from other debris like wood or concrete will make the recycling process smoother and is often required by the facility.
Dispose of Wood Posts and Debris
Getting rid of old wooden posts can be a bit more complicated. If the posts are untreated, burning them in a controlled pile might be an option, but you must check your local fire regulations first. However, many older fence posts were treated with chemicals like creosote to prevent rot. These treated posts should never be burned, as burning releases toxic chemicals into the air. If you’re unsure if your posts are treated, it's safest to assume they are. Your best bet is to contact your county landfill to ask about their policy for disposing of treated wood.
Check Your Local Disposal Rules
Before you load up your truck, take a moment to get familiar with your local disposal rules. Every county in Nebraska can have slightly different regulations for handling scrap metal, treated wood, and other construction debris. A quick search for your county’s landfill or waste management authority will usually give you the information you need. This step saves you from being turned away at the gate with a full load. If sorting, hauling, and navigating regulations sounds like a headache you’d rather avoid, we get it. Our team handles the entire cleanup process, ensuring everything is disposed of properly. Just give us a call, and we can take care of it for you.
What's Next for Your Land?
After the old fence is gone, you have a clean slate to work with. Taking a few extra steps to prepare the land now will make installing a new fence easier and ensure it stands strong for years to come. This is your chance to set the foundation for a secure and reliable boundary for your property and livestock.
Clean the Fence Line
The first order of business is to thoroughly clean the old fence line. Start by cutting away any tall grass, weeds, or brush that have grown up along the base. This helps you see the ground clearly, exposing any leftover wire scraps, rocks, or uneven terrain. It’s also smart to walk the entire path where the old fence stood. This allows you to map out the new line and spot any potential issues, like dips or low spots that need attention. For fence lines that are heavily overgrown with trees and thick brush, bringing in a professional for fence line cleaning can clear the way quickly and safely, saving you significant time and effort.
Prepare for Your New Fence
With a clear path, you can now focus on preparing the ground itself. If you removed old wooden posts, you might need to do some dirt work to fill the holes and level the area. For land with significant brush or uneven ground, creating a smooth, level path is key for a professional-grade installation. Any remaining posts from the old fence need to be completely removed. A manual post puller is an excellent tool for this, as it uses leverage to pull even stubborn posts straight out of the ground with minimal effort. Taking the time for proper ground preparation ensures your new fence posts will be set securely, preventing future leaning and extending the life of your investment.
Frequently Asked Questions
What's the biggest safety mistake people make when removing old wire? The most common and dangerous mistake is underestimating wire tension. Even on a dilapidated fence, some sections can hold a surprising amount of energy. Cutting a taut wire without releasing the tension first can cause it to snap back with incredible force, leading to serious injuries. Always work to loosen the wire from the posts before you make any cuts, and never stand directly in front of the line you are snipping.
What's the most difficult part of the job, the wire or the posts? While handling the sharp barbs on the wire is tedious, most people find that removing old wooden posts is the most physically demanding part of the project. Metal T-posts usually come out easily with the right puller, but wooden posts, especially corner posts that have been in the ground for decades, can be a real battle. They often break at the ground line or require heavy equipment like a farm jack to lift out.
Can I reuse any of the old fencing materials? You can often reuse metal T-posts if they are in good shape and you remove them carefully with a post puller to avoid bending them. However, it is almost never a good idea to reuse old barbed wire. It becomes brittle with age, loses its galvanized coating, and is prone to breaking, which means it won't reliably contain livestock. It's better to recycle the old wire and invest in a new, dependable product.
What's the best way to handle all the old wire for disposal? The safest and most efficient way to manage old wire is to roll it into tight, secure coils as you work. Cut the wire into manageable lengths, roll it up, and then use softer wire or zip ties to bind each coil in at least two places. This prevents the roll from springing open during transport. Tightly bound coils are much safer to handle and are what scrap metal recyclers prefer to see.
I started removing the fence and it's much worse than I expected. What should I do? It's very common to discover a project is bigger than you first thought, especially with overgrown fence lines or deeply set posts. If you feel overwhelmed or find the job is becoming unsafe, it's okay to pause. You can reassess if you have the right tools and enough time to finish safely. If not, calling a professional for a fence tear-out is a smart move that saves you time, prevents injury, and ensures the land is cleared correctly.
Comments